Import HECRAS 2D
Icon: ![]()
Ribbon: Roads Tab > Select Panel > Model Viewer dropdown > Import HECRAS 2D
HECRAS Tab > 2D HECRAS Panel > Import HECRAS 2D
Model Viewer: Model Viewer > Analysis Tab > > HECRAS 2D Panel > Import HECRAS 2D
Introduction
HECRAS 5.0 supports 2D flood modelling. In order to use HECRAS for 2D flood modelling it is required to load in a Terrain, usually via import of a GeoTIFF (.tif) file. The GeoTIFF includes terrain data (elevations) in the image, which is read into HECRAS and used to construct a surface model. Once a surface is included, users can include flows into HECRAS and apply 2 dimensional flow analysis across the surface with a variety of storms. Users select where the storm inputs are inserted along the surface boundary, and the outlet conditions for the surface.
This command allows round tripping of analysed flow data from HEC-RAS to be imported into Model Viewer for full 3D visualisation and simulation of the flow and flow extents over time. Although not strictly required, it would be usual to firstly use the Export HECRAS 2D command to send the surface data to HECRAS, and use this command to import the flow results in for 3D evaluation.
It the user's responsibility to ensure that the correct surface is displayed for the HECRAS input file, otherwise unexpected results will occur.
This command requires a flow analysis to be completed in HECRAS - as part of this analysis process the flow data is stored in a file (file is named *p##.hdf, when * is the name of the file and ## is a 'plan' number) and this can be imported by Model Viewer.
This command can be started from the menu/ribbon environment in the CAD application, or directly via Model Viewer. However the command is started, the import process is executed inside Model Viewer.
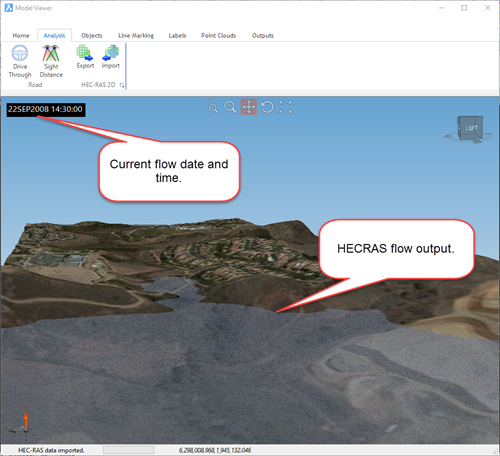
After running the import command, the results can be viewed inside Model Viewer via the Import HECRAS 2D command. Users can view any time stamp and assess the flow outcomes - the play button can be used to view 'real time' the development of the storm outputs over time.
The output is directly from HECRAS and is described by a grid of surface elevations. One elevation is assigned to each grid and is applied at each corner of the grid.
Below is a short video describing the export process, analysis in HECRAS, and export back to Model Viewer.
<<Video>>
Pre-Requisites
It is required to have a corresponding surface displayed in Model Viewer. Model Viewer is used to display the change in flows across the surface. The Toggle Display command should be used before running the command - if the software detects that Toggle Display has not been run, or may be outdated, the user will be prompted to review the model construction via Toggle Display.
Analysis must have been undertaken using HECRAS 5.x or later and a 2D flow must be analysed. As part of the 2D flow analysis process, HECRAS creates a file ending in p##.hdf. This file is imported into Model Viewer and visualised.
Synchronisation
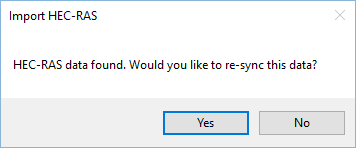
At any time, HECRAS can be re-run with different parameters to generate a new output file. Because this file name doesn't change (unless the user sets a different name), it is easy to update again in Model Viewer. When this command is run, the software will detect a saved .hdf file and prompt the user to re-synchronise with the updated file. Input shown below:
Default Water Style
By default, the presentation of the water surface will apply a Material Style named Water. Users can change this after loading the HECRAS file and opening the HEC-RAS Import form.
Note: If the Water Style is changed, it is required to reload the Model using the Refresh Model command or by pressing [ctrl]+[R]
Details
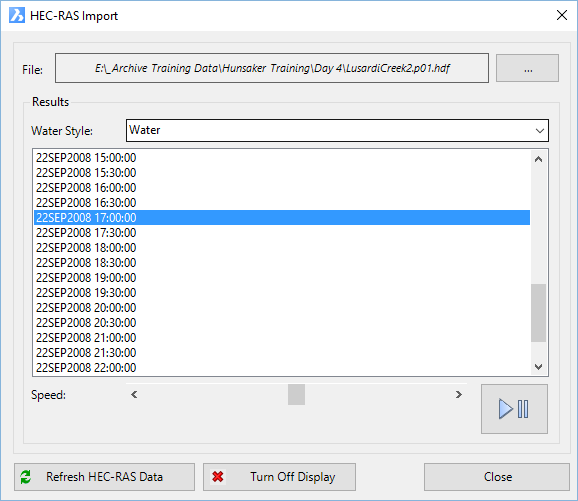
Upon selecting the command the following form is displayed:
|
|
|
|
File |
At the top of the form is the file path and name. The button ... to the right enables users to select the .hdf file to load. Note: only files with P##.hdf (where ## is a 2 digit number) contain the flow data required) |
| Results | This section manages the results (display) of the flow analysis |
|
Water Style |
Sets the render material/colour to display for the water surface |
|
Flow Times |
This lists the flow dates/times. Users can click on any particular date/time to view the flow results in Model Viewer. |
|
Speed |
The slider can be used to set a speed to use to cycle through the Flow Times list when the play/pause icon is clicked |
|
|
Click once to increment through (play) the flow times. This will simulate the changes in flow outcome over time. Click to stop animating the flow. |
|
Refresh HEC-RAS Data |
This command can be used to update Model Viewer after making changes in HECRAS and analysis. |
|
Turn off Display |
Click to remove the HECRAS results display from Model Viewer. Clicking on a flow time in the list or pressing the play/pause icon will re-display the flow results in Model Viewer |
|
Close |
Exits the form. |
 Play/Pause