Water Drop
Icon: |
|
| Menu: | Surfaces > Water Drop |
| Ribbon: | Surfaces Tab > Surface Edits Panel > Water Drop Grading Tab > Surface Edits Panel > Water Drop Site Tab > Surface Tools Panel > Water Drop (Civil 3D only) Roads Tab > Modelling Panel > Surface Manager Dropdown > Water Drop |
Introduction
The Water Drop command can be used to select any surface and trace water flow paths across the surface, working from user selected start points.
The command can be executed from inside the drawing or from inside Model Viewer.
-
When the command is run in the drawing, the user can select the layer to apply and the flow paths can be drawn as 2D (zero elevation) or 3D (elevations adopted from each triangle edge) polylines. A marker is placed at the user selected (upstream) points of each waterdrop
-
In Model Viewer, the user positions the mouse over the surface and location where a water drop analysis is required, right clicks and selects Water drop from the shortcut menu that displays.
This is a very useful command to explore the behaviour of water across the surface, working from selecting a location and then tracing the water path downstream to a low point or the surface edge.
The software uses the surface selected (or in the case of Model Viewer, the location of the mouse when the right mouse button was selected) to trace water flow paths. If it is desired to see the water flow path across multiple surfaces (eg: from the existing surface, crossing onto a design surface and then showing water tracing on the design surface) then the user must create a combined surface (in Civil 3D, this would be the creation of a surface and using the Edit > Paste option, and for AutoCAD/BricsCAD users the easiest method would be to use the Paste Surface command.
Details
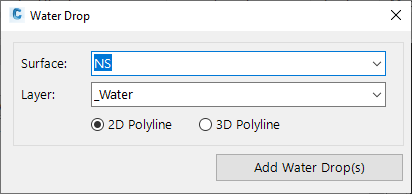
Upon selecting the command the following form is displayed:
CAD (Drawing) Environment
|
|
|
|
Surface |
Select the surface to apply water drop/s to. |
|
Layer |
Select the layer to draw the water drop lines on |
| 2D/3D Polyline | Toggle whether to draw 2D or 3D polyine/s for each water drop |
|
Cancel |
After clicking on the button, use the left mouse button to select upstream locations on screen. Water drops will be drawn at each button click. Press [esc] to stop the command. |
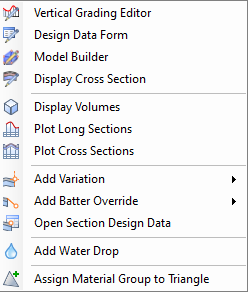
Model Viewer Environment
|
Right click to display the following shortcut menu: |
|
|
Add Water Drop |
Click on Add Water Drop. A water trace will be added from the location of the mouse on screen. |